A New Notebook


Y’all know me well enough by now right? So, of course you would expect nothing less from me than to share a DIY involving a notebook right? Because we all know I LOVE a notebook, right?
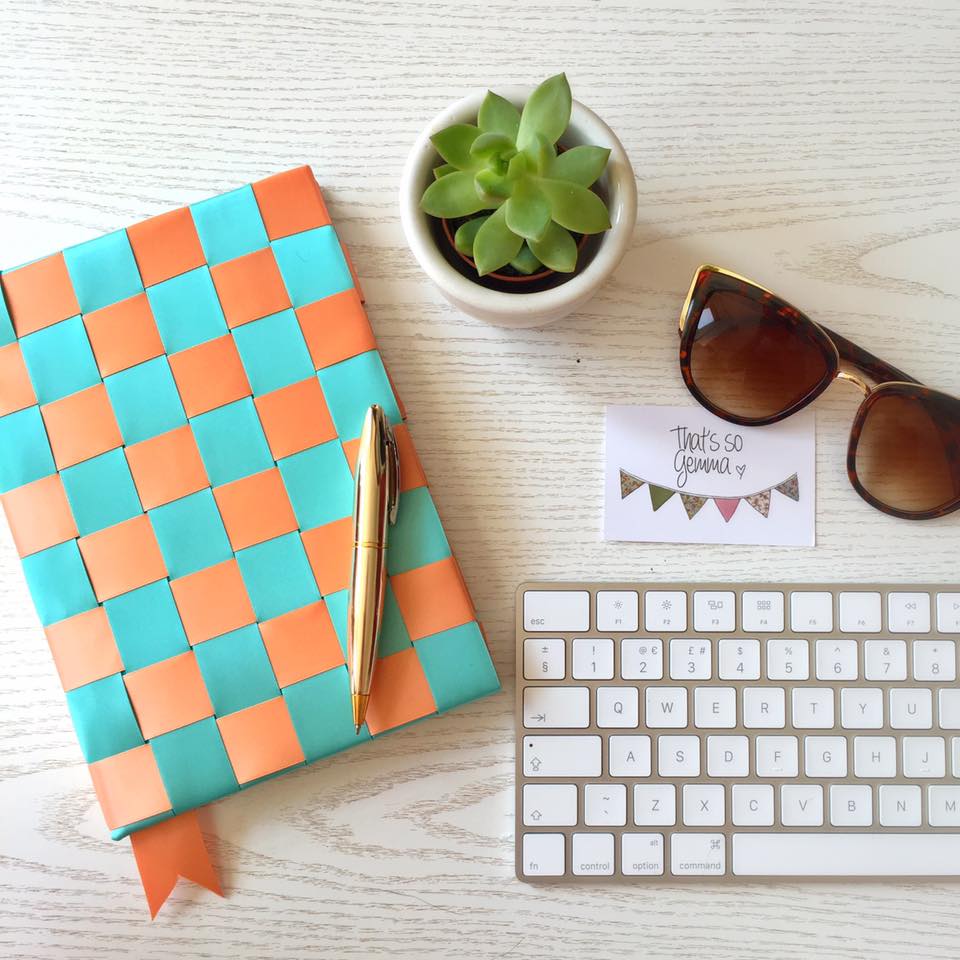
In classic ‘That’s so Gemma’ style, I’m here today to share with you all a nifty DIY hack to spruce up your tired looking notebook with a bit of TLC. I’m not afraid to admit that I am a sucker for a new notebook. If ever I am out shopping and I even catch a glimpse of a notebook I really struggle not to take a look. I am slowly learning that I probably (not definitely) don’t need any more. HOWEVER, that doesn’t mean I can’t create a ‘new’ notebook from one that I already own… right?

All you need for this make is:
- 1 notebook, old or new!
- 4 metres of ribbon in 2 different colours (or more if you fancy going wild)
- 1 glue gun, or strong adhesive
- Scissors
- Matching coloured card
Can you tell my poor old notebook was longing for a makeover with it’s lacklustre exterior?
Begin by measuring your ribbon to the size of your notebook. The ribbon going round the width of your notebook will need to be longer to cover both the front and back cover page. For this notebook I needed 8 widths and 12 lengths… use the width of your chosen ribbon to indicate how many strips you will need to cover the page. Allow 2cm either end to overlap.

Start gluing down your ribbons side by side on the inside of the front cover.

Attach the ribbons along the width and the length of the page, then close the page and tidy the position of the ribbon.


Begin weaving the ribbons over the cover… Do y’all know how to weave?
Simply slide the ribbons over-under-over-under
the alternate under-over-under-over
Simple!

When the first page is complete, stick down the ends of your ribbons going through the length of the notebook (in my case, blue). This will keep your weave in place whilst you continue on to the back page.

Start gluing the ribbons on to the inside of the back page then continue the weave on the back cover of the book.

When all ribbons are woven, secure them down to the inside of the cover. Allow a little slack for the width of the notebook so it can easily be opened and closed.
Glue down a piece of ribbon to the top left corner on the back page, this can then be used as a book mark!

Finally, cover the insides with a piece of matching card to hide the scruffy edges of the ribbon.

Ta Da! One happy and stylish new notebook!

Now, I’ve shown you mine… Will you show me yours?
Send pictures or links directly to me at thatssogemma92@gmail.com
Enjoy your new desk accessory and start writing down your notes in style!


