Make Everything Bow-tiful
Now I don’t know about you guys, but I’m pretty sure that I’m not just speaking for myself when I say that Bows pretty much belong on anything! From gift wrapping, scrapbooking, decorations and home decor… whack a bow on it! They brighten up everything and add a unique special touch.
Today I’ve been getting my craft on and experimenting with different ways to make bows. With some handy tips and tricks I learnt, I thought I’d pass the favour on to you all and show you 3 simple ways to make super cute bows… and yes just in case the photo caused any confusion, you will need a fork!
First up is the basic bow, at first attempt it was fairly fiddly but just like riding a bicycle, once you know how you will never forget!
At this stage you should see a pretty bow start to form! Ensure you pull the two ends as tight as possible then slide it off the fork and trim the ends!
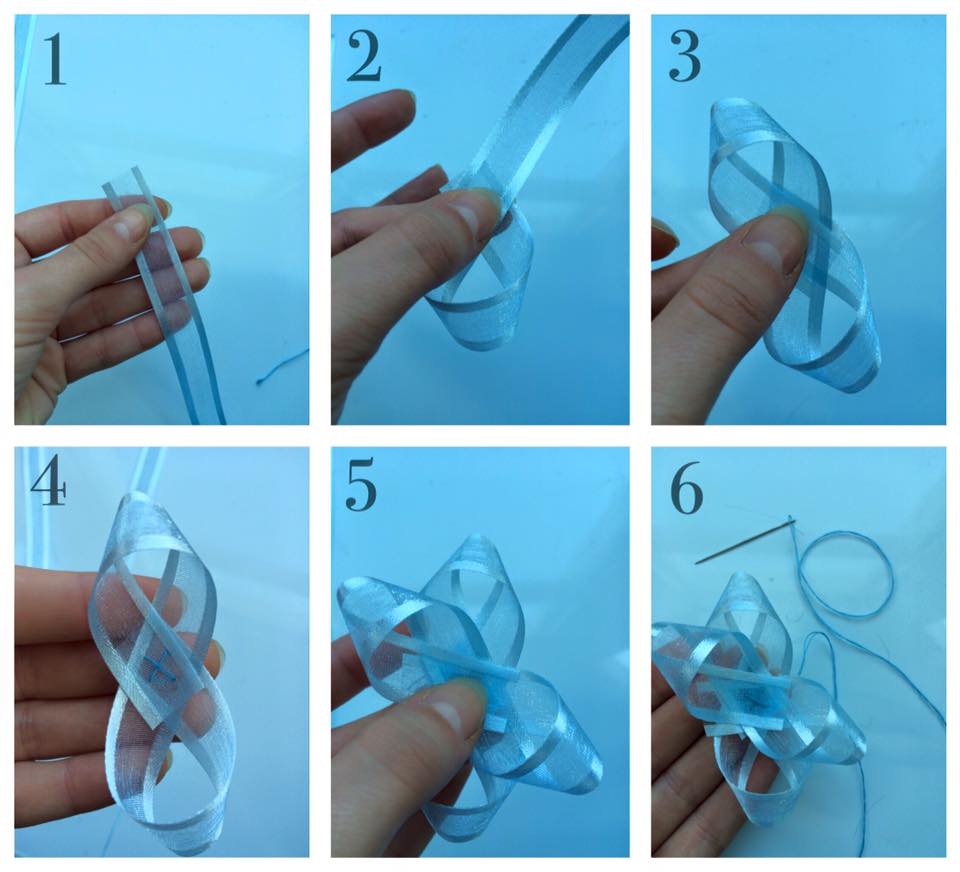
This next Bow is absolutely ideal for gift wrapping, adding a pretty, homemade touch to any special present, and what a nifty idea as it will double up as a second gift becoming a decoration too!
When sewing my ribbons together I created a simple cross stitch to keep it from moving out of position, I repeated this for every strip of ribbon.
Once all three pieces of the longer ribbon are secured with a cross stitch, begin the exact same process with the shorter length of ribbons and sew in the centre.
Now add a pretty decoration of your choice to the centre to hide the stitches!
This last bow that I created is probably the most least fiddly, so if you’re in a last minute rush then definitely choose to make this one! I decided to make mine rather quirky by using bright contrasting colours.
Use double sided sticky tape to secure the loop then stitch them together layering them on top of each other.
Now stitch on a button or bead!
What a bow-tiful day! What have you all been up to? Would be great to hear about your latest makes and creation! Get in touch via my contact link here!


